Categories
Blog Education

How to Set an OCO Bracket

So you have your stock purchased, but your trading plan says that you should set a Stop price that you would want to sell at if the price reaches it.  While you’re at it, you want to put in a Sell Limit at the upper price that you want to sell at if the price reaches it. What you want to do is set up an OCO Bracket – otherwise known as a One Cancels Other Bracket.

3 Easy Steps to Create an OCO Bracket

Using TD Ameritrade, it’s actually simple to enter the order that will either sell at the top when your target price is hit, or stop out at the bottom if the trade turns against you.  There are just 4 steps to walk through to get the order setup.

  1. Search for your stock
  2. Create a closing order
  3. Adjust the price points
  4. Walk Away knowing you are covered

Now that you know the steps, let’s walk through them in a bit more detail.

Step 1 – Search for Your Stock

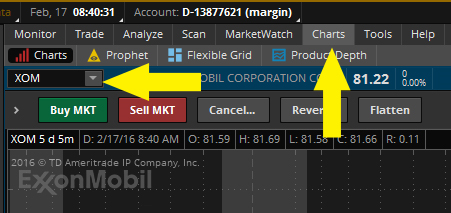
In the entry space for the search box, type the ticker symbol for the stock you want to setup the order around.

search-for-stock

Step 2 – Create a Closing Order

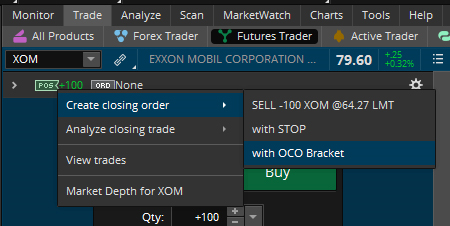
Right click on the “POS” indicator, choose “Create closing order” and then “with OCO Bracket”

save-closing-order

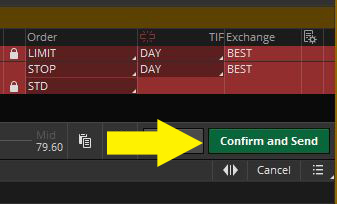
When the box for your order displays, click on “Confirm and Send” button to accept the defaults for the change in order.  You will make updates to it in the next step.

confirm-and-send

Change your view to the Chart tab and search for the stock you are working with.

search-for-stock-again

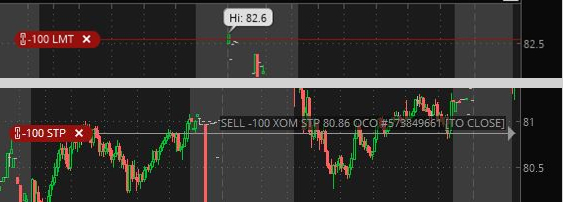
Now you should see two new additions to your view – a Stop Order and a Limit Order.  These are the two items that will form your bracket.

oco-order

Step 3 – Adjust Your Price Points

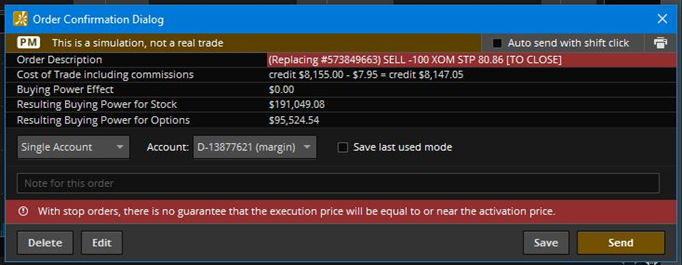
Adjust the Stop order and Limit order to your desired levels that you calculated in your trading plan.  Once you make a change, you will have a confirmation box that you must accept the changes to… click Send.

adjust-and-confirm-order

Review the 3 Steps to Creating an OCO Bracket

That’s all there is to it.  Now you have the freedom to go live your life because you know that if the stock rises up to your Limit price, your broker will sell it for you.  Also, you can rest assured that it the stock takes a turn and breaks down that your broker will sell for you at your Stop price.


Additional Viewing Options:

Would you like to view a video or presentation on this topic?
Check out this video on Youtube https://youtu.be/L0j8pFHaFys
Download the presentation on SlideShare https://www.slideshare.net/mikeauten/how-to-set-an-oco-bracket

Categories
Blog Education

How to Buy a Stock in 5 Simple Steps

If you’re thinking about becoming a stock market trader, you’re probably wondering about all of the things you’ll need to know to be successful. One of the first things to think about is knowing how to buy a stock. Here’s a quick walk-through to show you how to make a stock purchase using broker software.

5 Simple Steps to Buying a Stock

  1. Open Your Broker Software
  2. Search for the Stock
  3. Click the “Buy” button
  4. Review the Purchase Information
  5. Send the Order

There are actually 5 simple steps to buying a stock. While these steps are roughly the same, no matter what broker software you use, you may need to look up exactly how to do it in yours. For this example, we’ll use TD Ameritrade. Now, let’s review each step in more detail.

Step 1 – Open Your Broker Software

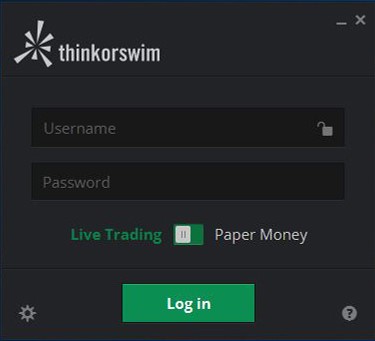
Open Your Broker Software – Seems simple enough. Open the Think or Swim platform and enter your username and password. If you just want to practice, you can choose the “Paper Money” option – but normally you would choose “Live Trading”. With everything entered in, click the Log In button to continue.

Step 2 – Search for the Stock

Select the Charts Tab

Select the Charts tab

Find the Stock

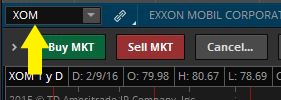
Find the stock you want to buy.

Now that the application is open, you need to make sure you are on the correct tab so you can find the stock you want to buy. Click on the Charts tab and then enter in the stock ticker to search for the stock. With most brokers, you will see your choices narrow with each letter you type in the search box. If you accidentally type it wrong, you will see that it can’t be found. Just back up and try it again.

Step 3 – Click the “Buy” button

Click the Buy Button

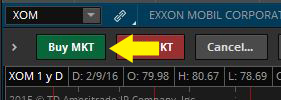
When you see the chart for the stock you want to buy, just click the “Buy MKT” button to start the purchase process. Keep in mind, in this example, you would be buying at the Market price (which may not be the price you wanted to buy at). You can edit the price in the next step.

Step 4 – Review the Purchase Information

Review the Purchase Information

You should always review the purchase information before executing your order. Make sure that you have the number of shares correct. It’s also a good idea to confirm the price you are buying at (unless it’s a market order). Also, check out the cost of the trade (including the commission being charged) so you know what it will cost you.

Step 5 – Send the Order

Send the Order

When all of the trade information is correct, the only thing left to do is to press the Send button and your order will be entered. Depending on the volume of orders, it may take some time to get filled.

Review the Chart

Review the Chart

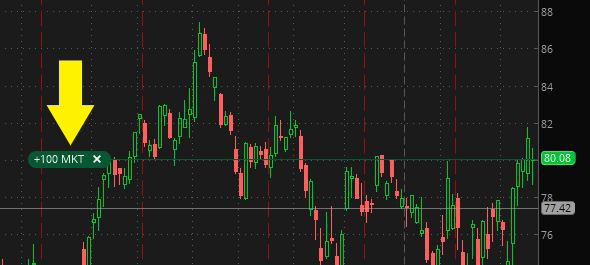
If everything went well, you should now have the trade referenced on your chart. That’s all there is to buying a stock.

Review the 5 Simple Steps to Buying a Stock

Now that you’ve been through the whole process, its simple to see that it’s just 5 simple steps. Opening your software, Finding the stock, Clicking the buy button, Reviewing the purchase information and sending the order.

Additional Viewing Options:

Would you like to view a video or presentation on this topic?